When to Post (Learning to Review Insights and Analytics)
A frequently asked question is, "When should I post on social media?" It's a good question but unfortunately, there's not a magical answer like posting at 6 p.m. on Thursday will always ensure all your followers will see your content.
The best times to post are different for each social media page. Your unique audience will have specific social media usage habits — which will constantly change. That's why it's important to review the insights and analytics sections of the social media platforms your agency is on.
Most platforms provide helpful statistics on the dates and times your followers are most active. Review these insights and analytics frequently and choose days and times to post based on the data. Experiment, and over time, you'll figure out the most effective posting cadence for your pages.
Here's how you can access the insights and analytics data
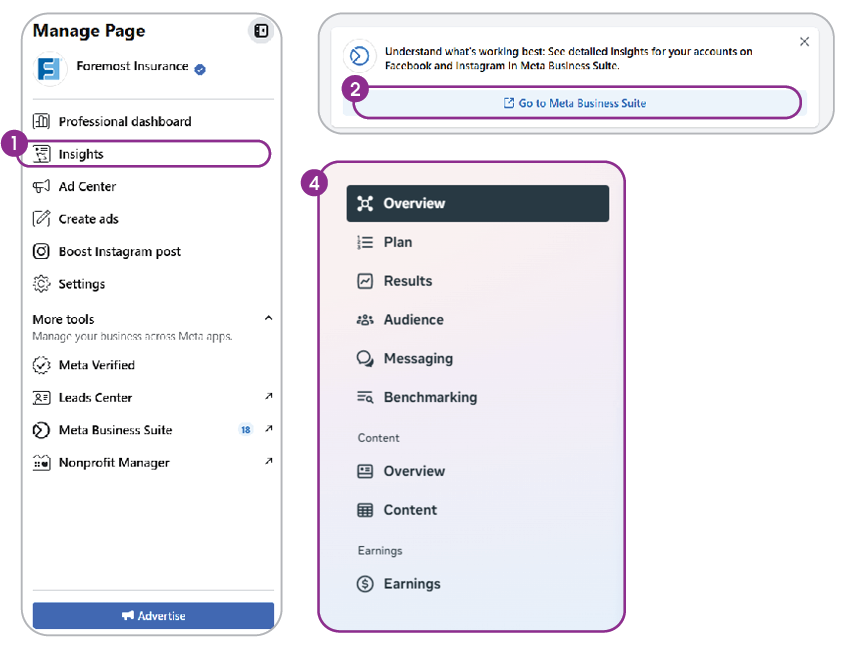
Facebook & Instagram Through Meta Business Suite
- While on your agency's Facebook page, click the Insights button on the left column.
- Click Meta Business Suite, which will open a new window.
- Then click the Insights button on the left for more details.
- There are many helpful statistics to review, so take time to explore each section. We recommend visiting the Audience section and then clicking Trends, where you can learn more about the days and times your followers are the most active on Facebook. If your Instagram account is linked to your Facebook account, you can also view Instagram insights by switching to Instagram from the platform dropdown at the top of the page.
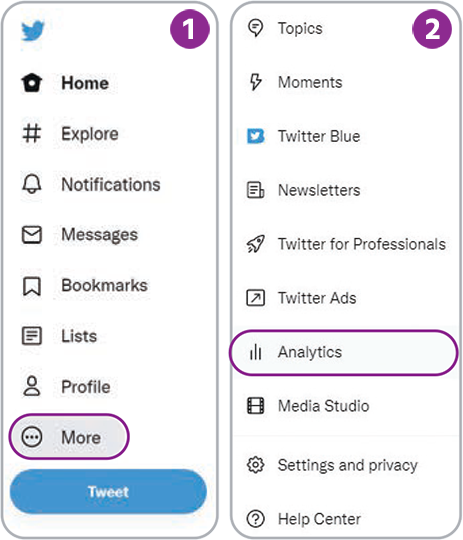
X
As of 2025, full Analytics are only available to X Premium users. However, anyone can view the analytics on individual posts.
- To view individual post analytics, click the bar chart icon in the lower-right corner of a post, or click the three dots in the upper-right corner of the post and then the View post analytics button. These methods will open the Post Analytics window, which will show details like impressions, engagements and other interactions.
- To view full analytics through an X Premium account, navigate to the Premium tab in the column on the left-hand side. Under quick access, select Analytics. To learn more about your followers, go to Audience.
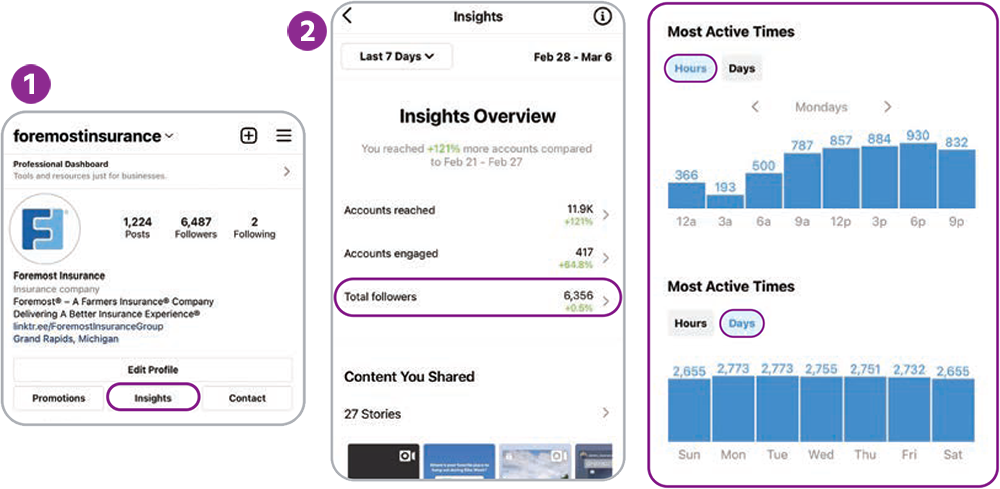
Instagram
- On your agency's Instagram page, click the Professional Dashboard button (below your
bio).
- There's a lot to review in the Insights section that opens. We recommend clicking
New followers. This will lead you to the Followers section, where you can find your followers' most active days of the week and times.
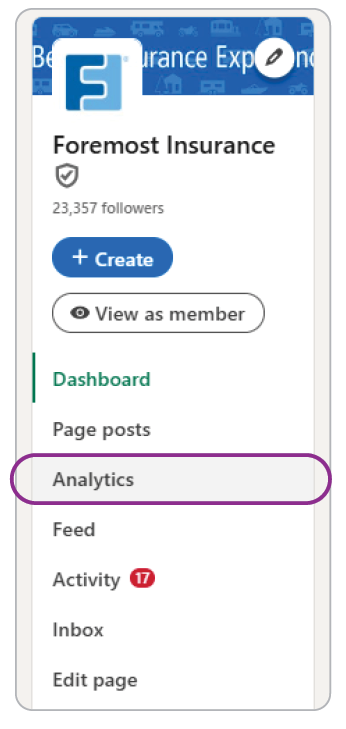
LinkedIn
- At the top of your agency's LinkedIn page, click Analytics.
- Learn more about your audience by clicking Visitors and Followers.
YouTube
- From your agency's dashboard in YouTube Studio, click Analytics in the left column.
- Select Audience to discover insights about your viewers.
Posting Recommendations
Another common question is, “How often should I post?” Again, our answer is, “Find what works best for you!” But this time around, we do have frequency suggestions to start with. It's important to keep your social media pages active. Posting consistently can grow engagement over time and helps keep your agency top of mind for potential customers.
Having recent posts also helps make a good first impression. If a newcomer finds your social media page and sees you haven't posted in months, they might wonder if your agency is still open and active!
If you don't have time to post every day, don't fret! Many social media platforms have built-in scheduling features. So, when you have time to prepare social content, you can schedule your posts to be published days, weeks or even months in advance.
Here are suggested frequencies for posting and notes on built-in scheduling for various social platforms:
Facebook
- Suggested Frequency: 3-5 posts/week
- Built-In Scheduling: Yes
- From Facebook, click the Meta Business Suite button on the left column.
- Click Content to see all published and scheduled content, along with other details.
- On this page, click the Create post button in the upper-right corner, which will open a posting window. If your Instagram account is linked to your Facebook account, you can also schedule posts to Instagram here by checking the Instagram box in the Post to dropdown at the top of the page.
- Add your post content and then select a date and time to publish your post.
- Press Schedule in the bottom and then your post will be added to the Scheduled tab on the Content page.
For more in-depth guidance on using the Meta Business Suite for scheduling posts, check out our Meta Posting Walkthrough and other resources available on YouTube.
Instagram
- Suggested Frequency: 1–3 posts/week, 1–2 stories/day
- Built-In Scheduling: Yes
- Make sure your Instagram account is set to Professional (Business or Creator). This is required to access the scheduling feature.
- Tap the "+" icon at the bottom (or top right) of your screen to start creating a new post.
- Add your media and a caption and then tap Next until you reach the final screen before sharing.
- Tap More options (scroll to the bottom), then turn the Schedule this post toggle to On.
- Choose your desired date and time for publishing.
- Tap the back arrow in the top left to return to the drafted post, then tap Share and your post is scheduled!
- To confirm you’ve scheduled the post: Tap the ≡ (hamburger menu) in the top-right corner of your profile. Scroll to the For professionals section, tap Scheduled content and confirm your post appears there.
X
- Suggested Frequency: 5–10 posts/week
- Built-In Scheduling: Yes (This is available only on desktop for free users. In-app scheduling is available only for Premium users. View third party options for scheduling as well.)
- Click Post and create your post.
- Click the calendar with a clock icon at the bottom of the post menu.
- Select a date and time for your post to run and click Confirm.
LinkedIn
- Suggested Frequency: 1–2 posts/week
- Built-In Scheduling: Yes
- On your agency's LinkedIn page, either click the + Create button and/or the Start a post posting space.
- After you've added your content to the post, click the clock icon next to the Post button to schedule a publish time. From here, you can also View all scheduled posts.
- Click Next and then Schedule.
YouTube
- Suggested Frequency: Upload whenever you have a new video — follow your content plan!
- Built-In Scheduling: Yes
- From your agency's dashboard in YouTube Studio, click the Create button or the Upload button in the top-right corner.
- Upload your video and complete the Details, Video elements and Checks steps.
- Within the Visibility step, click the arrow in the Schedule section to expand the scheduling options.
- Select the date and time you'd like your video to be published and then click the Schedule button.
Instagram
- Suggested Frequency: 1-3 posts/week, 1–2 stories/day
- Built-In Scheduling: Yes
X
- Suggested Frequency: 5-10 posts/week
- Built-In Scheduling: Yes (This is available only on desktop for free users. In-app scheduling is available only for Premium users. View third party options for scheduling as well.)
LinkedIn
- Suggested Frequency: 1–2 posts/week
- Built-In Scheduling: Yes
Tools of the Trade: Scheduling

We've noted that some social media platforms offer built-in scheduling tools, but others do not. If you're managing multiple social media pages, you may want to consider using a single platform that helps you manage and schedule posts for all your social media pages. Here are a few examples:
Platforms for Managing Facebook, Instagram, Twitter and LinkedIn
- Agorapulse®
- Buffer
- Crowdfire
- Hootsuite®
- Sprout Social®
Tagging Other Accounts
Tagging is a helpful feature on almost all social media platforms. When you tag people or organizations in a post or photos, you are essentially giving them a shoutout and linking them to your post. Tagging someone will send them a notification — which will potentially bring them to visit your page. A thoughtful tag may also bring that person or organization's followers over to visit you as well!
To tag, simply type the "@" symbol and start writing the person or organization's username or page name. The name should pop up as an option for you to click — linking to that person or organization's profile. For example, to tag Foremost on Facebook, type "@ForemostInsurance" in the post copy. Our profile name will pop up as an option to tag. Once you click our name, "@ForemostInsurance" will now show up as the entire account name — "Foremost Insurance" — and be highlighted in blue.
Tagging can be a great way to give shoutouts, build bridges between others in your network and notify people of relevant or useful information you're sharing. Additionally, some platforms (like Instagram) offer the ability to tag users directly in a photo, which looks cleaner and more modern than the simple @ symbol, and gives you more control in showing who you've tagged. This should be an option when you go to schedule a post, labeled Tag People.
Utilizing Hashtags
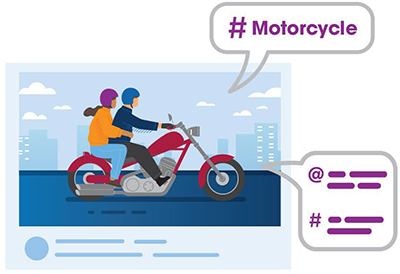
Hashtags (written with a # symbol) are used to index keywords or topics on most social media platforms. It allows people to easily follow topics they're interested in. For example, if you're sharing a post about motorcycle insurance, try including the hashtag: #Motorcycle. This will get your post in front of motorcycle enthusiasts who follow the #Motorcycle feed, potentially expanding your reach.
Here are a few notes on hashtag etiquette:
Facebook, Twitter and LinkedIn
Hashtag use on these platforms is helpful but optional. Don't go overboard — pick one or two hashtags that best represent your post.
Instagram
Hashtag use on Instagram is recommended. You're able to share 30 hashtags per post, but we recommend keeping it to 10 or less. We also suggest commenting on your post with your list of hashtags instead of including them in the post description. This tactic works just as well and makes your post look more organized and professional.
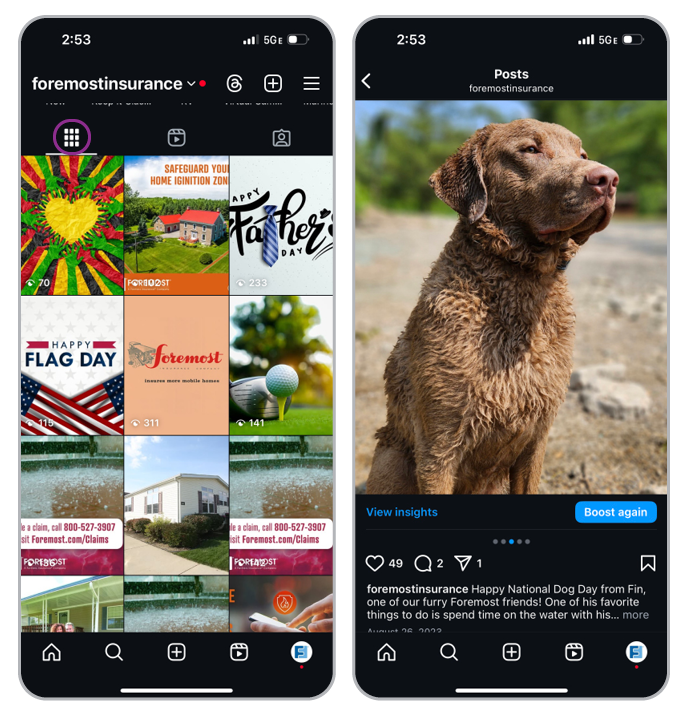
Navigating Instagram and Increasing Engagement
Although you can access Instagram on a computer, it's a platform that's crafted to be experienced on a mobile device. This makes managing an Instagram account notably different than the tactics you'd use on other platforms, like Facebook. To help you navigate this, we've compiled several quick tips to help you increase engagement and reach more customers on Instagram.
First, let's break down different types of Instagram content: Posts, Reels and Stories. (There are more than three types, but these are the most notable.)
Posts are the foundation of Instagram. They're the photos or videos that you share directly to your Instagram feed – which is essentially your home base and what users first see when they view your profile.
Reels are a specific type of short-form Instagram video. They're ideally vertical; often short but can be up to 60 seconds long; and you can add music, on-screen text, closed captions and visual effects in-app before posting. Reels appear in the tab that's to the right of your main feed. They're similar to the videos shared on TikTok. In fact, many people share their TikTok videos to Instagram as reels.

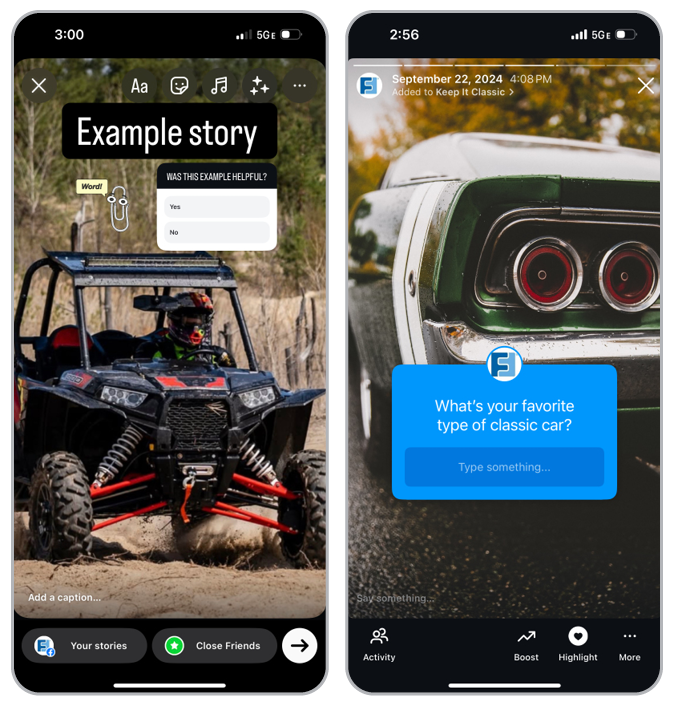
Stories are content (photos, videos or other graphics) that show up for 24 hours – after that, they disappear. Ephemeral posts like this are excellent for sharing quick updates, daily moments from your office, announcing new posts or reels on your feed, running interactive content (like polls), sharing other people's posts or reels, and giving shoutouts to other accounts.
When you share a story, a circle will appear around your profile picture. Anyone who clicks on your profile picture (including you) will be able to view your story. On your Instagram newsfeed, you'll notice a row of other accounts with circles at the top – click these to view others' stories.
If you'd like to save your story so others can view it later, you can do so in the Story Highlight section of your feed. Highlights will be pinned at the top of your feed. This is a great way to distinguish stories that are especially interesting or feature helpful content that your customers would benefit from viewing again later.
What Does Instagram Engagement Look Like?

Likes: When a user reacts to a post by "liking" it.

Comments: When a user takes time to write a comment on a post.

Shares: When a user sends a post to other users via a direct message or shares a post to their stories.

Saves: When a user puts your post in a special "saved" folder so it's easier to find and revisit later.

Followers: When a user clicks the "Follow" button to ensure they'll see more of that account's content in the future.

Mentions: When a user "tags" an account using the "@" symbol and an account's username. Mentions are clickable and will send users to view that account.

Direct Messages: Also known as "DMs" — when a user sends a message to one's private inbox.

Link Clicks: Every Instagram user has space to share one link in their bio — link clicks occure when a user clicks this link.